
How to care for a Crosby dressage saddle is a question many riders ask after investing in one of these classic leather saddles. Crosby saddles are known for their balanced design, supple leather, and long lifespan, but like any quality leather saddle, they require regular care to stay comfortable for both horse and rider.
Without proper cleaning and conditioning, sweat, dirt, and dust can slowly dry out the leather and weaken important areas like billets and stitching. A little routine maintenance makes a huge difference. When cared for correctly, a Crosby dressage saddle can remain soft, supportive, and reliable for many years of riding.
In this guide, I’ll walk you through simple steps to clean, condition, and store your Crosby saddle so it stays in excellent condition and continues to fit your horse comfortably.
Affiliate Disclosure:
Some links on this website are affiliate links, which means I may earn a small commission if you make a purchase through them, at no additional cost to you. I only recommend products I genuinely believe are useful for riders and safe for their horses.
If you’re still learning about the Crosby line, you may also find my full Crosby Dressage Saddle Review helpful before diving into saddle care.

How to Care for a Crosby Dressage Saddle
Caring for a Crosby dressage saddle keeps the leather supple and helps the saddle remain comfortable for both horse and rider. Follow these basic care steps to protect the leather and extend the life of your saddle.
1. Wipe the saddle after every ride
2. Clean with saddle soap
3. Condition leather regularly
4. Check billets and stitching
5. Let saddle dry naturally
6. Store on a proper saddle rack
Why Proper Crosby Saddle Care Matters
Protecting High Quality Leather
Crosby dressage saddles have a reputation for good leather that feels supple under the hand. But even the best hides can dry out, stiffen, or crack with neglect. When sweat, dust, or the wrong cleaner gets left behind, the leather’s natural oils can fade, making it more likely to become brittle. Keeping up with the basics will help your saddle stay soft and resist wear.
Extending the Life of Your Saddle
Well cared for Crosby saddles regularly last 20 years or more. Some riders even pass them down between friends and family. Saddles that get cleaned and conditioned on a regular basis hold up better under daily use and fetch a higher price later on if you decide to sell or upgrade.
Maintaining Comfort for Horse and Rider
Supple leather molds better to your horse’s back and to your seat. Keeping your saddle in good condition helps avoid hot spots, pinching, or creating pressure points that often show up when leather starts to stiffen or crack. Both you and your horse will notice the difference in how the saddle feels and moves.
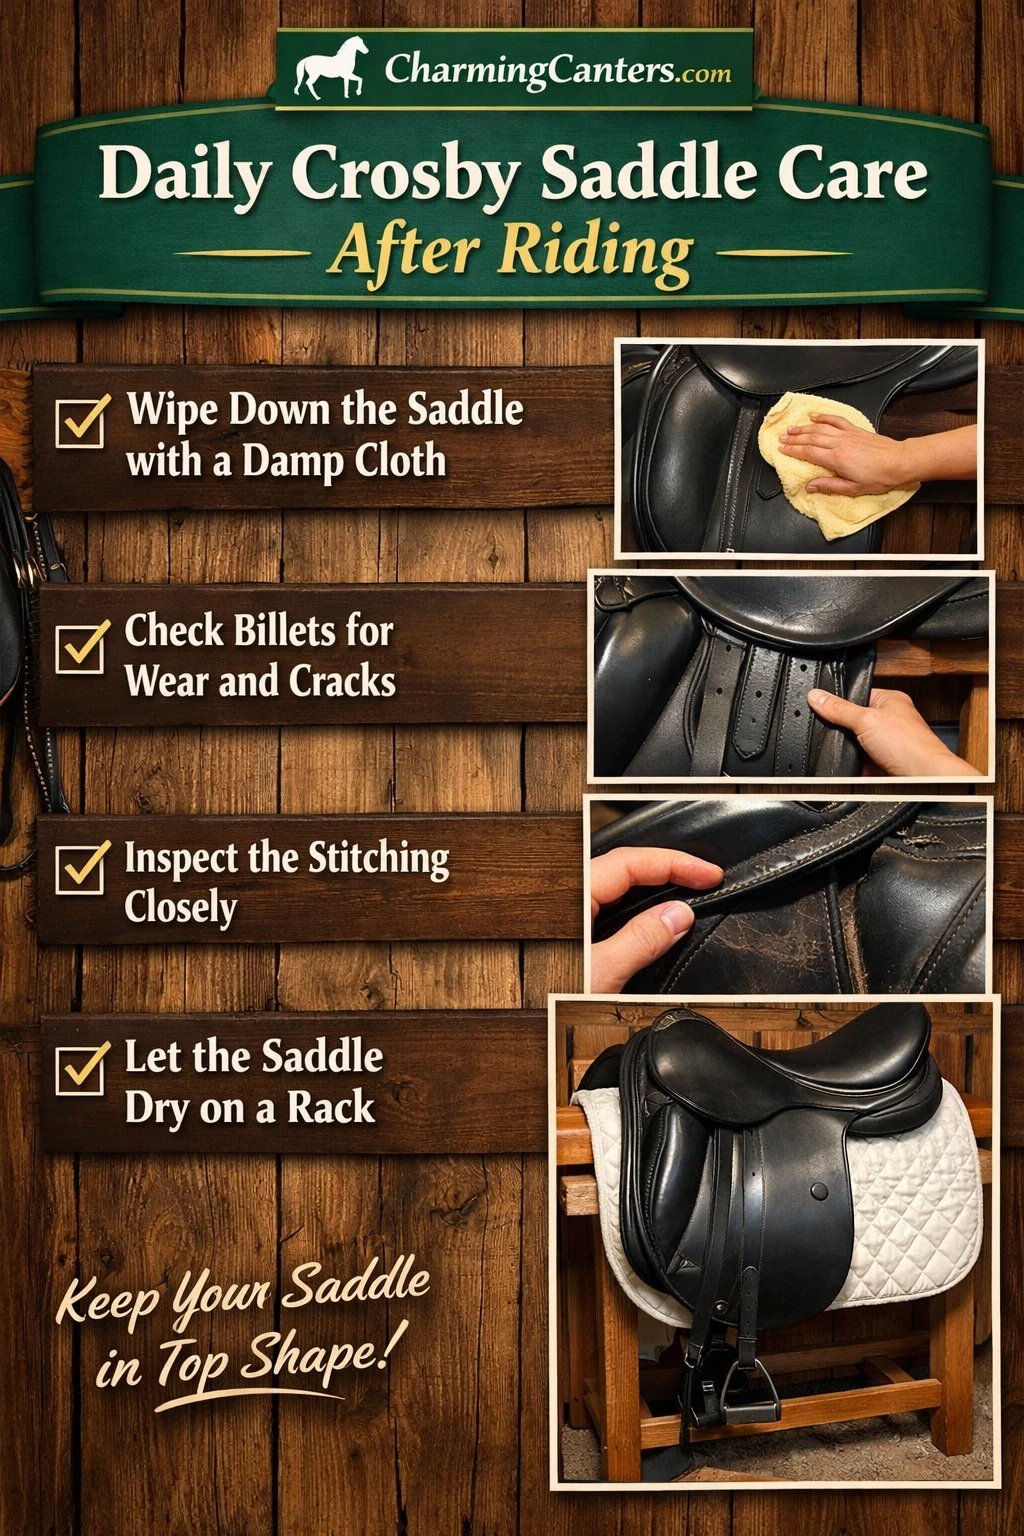
Daily Crosby Saddle Care After Riding
Wipe Off Sweat and Dirt Immediately
One of the biggest mistakes is leaving sweat and arena dust to dry on the leather. After each ride, I grab a damp (not wet) sponge or cloth and quickly wipe down the seat, flaps, and panels. This removes salt and grime that could break the leather down over time.
Check Billets and Stitching
Dressage riders put a lot of pressure on billets and flaps from girthing and movement in the saddle. During daily care, I lift the flap and look at the billets, especially where they bend, for signs of cracks or stretched stitching. Catching problems early helps prevent a broken billet in the middle of a ride.
Allow the Saddle to Dry Naturally
After cleaning, I always let my Crosby dry in a cool spot out of the sun, never over a heater. Direct heat can dry the oils out of the leather and lead to cracking. Hanging the saddle in a well ventilated tack room or on a proper rack does the trick.
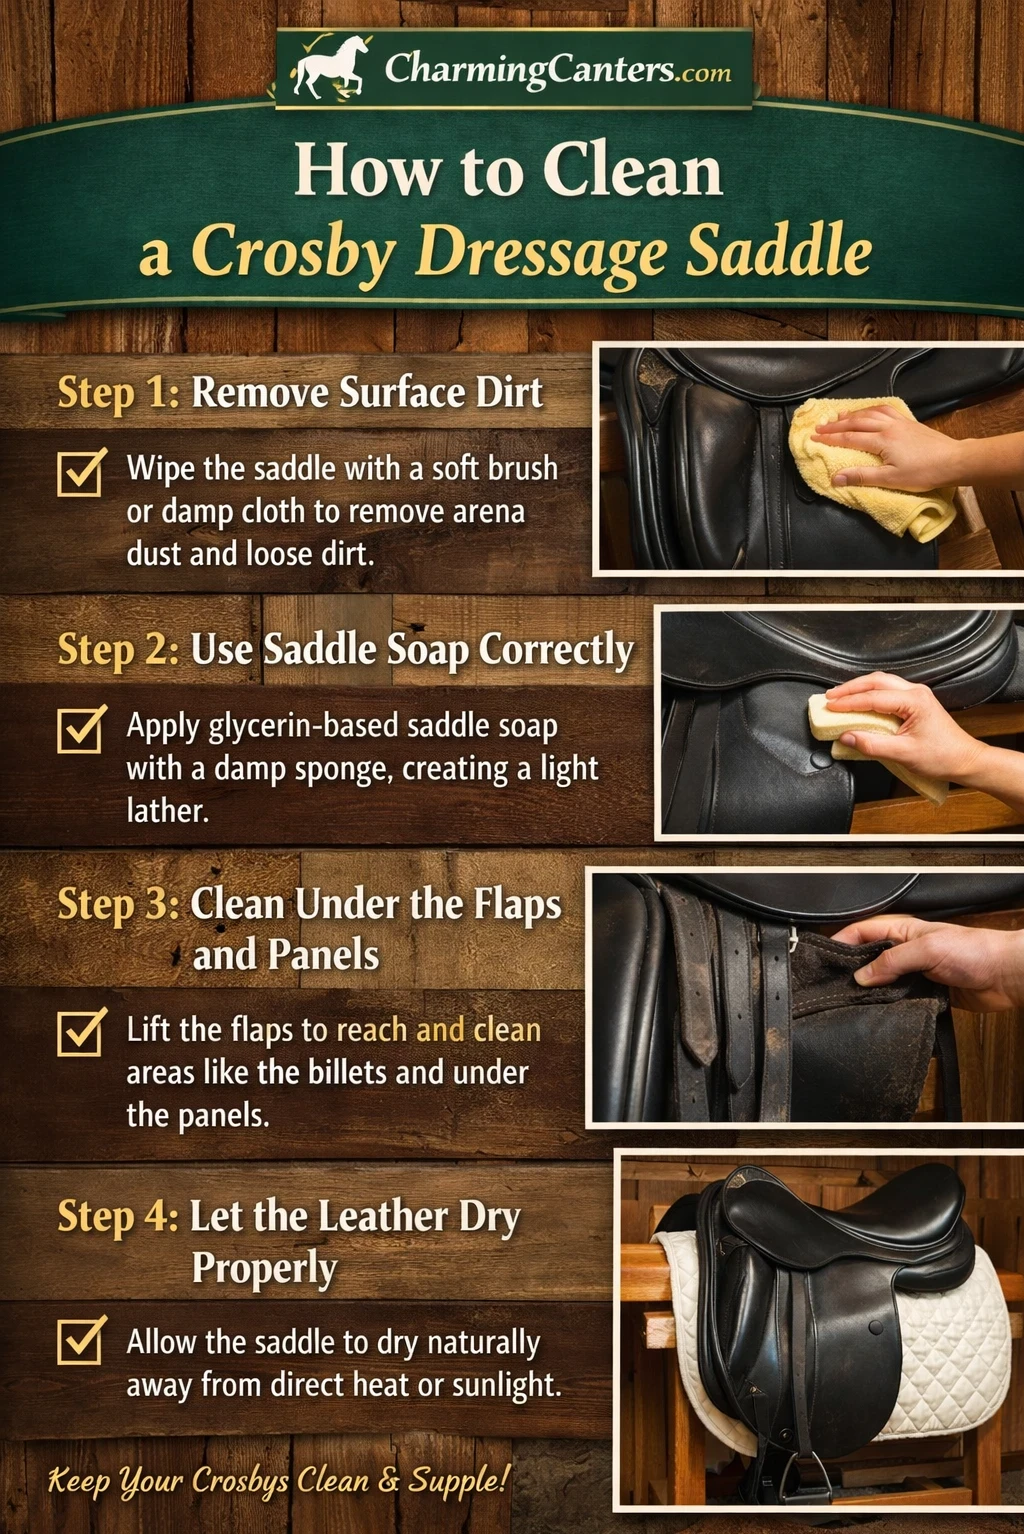
How to Clean a Crosby Dressage Saddle
Best Products for Cleaning a Crosby Dressage Saddle
• glycerin saddle soap
• leather conditioner
• soft tack brush
• microfiber cloth
Step 1: Remove Surface Dirt
Start with a soft brush or clean, damp cloth and wipe away all dust and loose dirt. It sounds basic, but skipping this step lets grit scratch the leather during the actual cleaning process.
Step 2: Use Saddle Soap Correctly
When your Crosby needs more than just a quick wipe, I reach for a glycerinbased saddle soap or a product meant specifically for leather saddles. Apply the soap using a soft, slightly damp sponge, working it up into a gentle lather. Less is more; over soaping can create buildup that stops the leather from breathing.
Step 3: Clean Under the Flaps and Panels
The sweatiest, dirtiest areas are usually hidden: under the flaps, billets, and panels. Flip the flaps up and pay close attention to these parts. This is where salt stains and dust gather and often where the first signs of wear happen if missed.
Step 4: Let the Leather Dry Properly
Once you’ve soaped and rinsed (with a damp cloth, not soaking wet), pat the saddle dry with a clean towel and let it air dry before conditioning. Never hurry this step by putting the saddle in the sun or close to direct heat.
Conditioning the Leather
When to Oil vs Condition a Saddle
Crosbys often do well with a light conditioning routine instead of heavy oiling. I use a reputable leather conditioner made for saddles and only turn to neatsfoot oil or similar if the saddle feels unusually dry. Over oiling can lead to mushy, weak leather, which nobody wants.
How Often Crosby Saddles Need Conditioning
For a saddle ridden daily, conditioning every two to four weeks is usually enough. If the leather feels stiff, gets exposure to rain, or the air is super dry, I condition a bit more often. New to me or rarely used saddles might benefit from an initial deep condition followed by less frequent maintenance.
How to Apply Leather Conditioner Safely
After the saddle is dry and clean, I use a soft cloth to rub a thin layer of conditioner onto all leather surfaces, including flaps, seat, panels, and billets. Buff off any excess and give the saddle a few hours to absorb the product before using it again. Always skip the suede or rough textured areas (if your Crosby has any) and use extra caution on older saddles with thinning leather.
Special Care for Billets and Stirrup Leathers
Why Billets Wear Out Faster
Billets on a dressage saddle bend back and forth with each ride, taking a lot of stress. Combined with sweat, this wears them down faster than most parts of the saddle. That’s why I make them a focus during care.
Signs Billets Need Replacement
If you spot cracks, thinning, or stretched holes on the billets, it’s worth talking to a saddler about replacing them. Riding with compromised billets can cause real safety risks.
Keeping Stirrup Leathers Soft and Strong
Stirrup leathers also need regular cleaning and a light application of conditioner. I rotate my leathers occasionally to even out wear and replace them every few years if they feel stretched or weak. If you want your gear to last, this habit can make a difference in terms of both safety and comfort.
How to Store a Crosby Dressage Saddle Properly

Using a Saddle Cover
A clean, breathable cover keeps dust away and helps the saddle stay nice between rides. Make sure the cover isn’t waterproof or plastic, as these can trap in moisture and damage the leather over time.
Avoiding Moisture and Heat Damage
I store my Crosby in a spot far from direct sunlight, damp corners, and heat vents. By keeping the storage area at a steady, mild temperature with good airflow, the leather stays protected from mold, mildew, and excess drying. This little bit of planning can keep your saddle looking great for years.
Storing the Saddle on the Correct Rack
A proper saddle rack helps hold the shape of the seat and panels. I make sure it’s wide and supportive, not a thin pole or wall peg that could dent or warp the leather. Using a rack that supports the entire weight of the saddle is key to avoiding unintended damage. If you store your saddle with care, you’ll maintain better comfort and appearance down the road.
Common Crosby Saddle Care Mistakes Riders Make
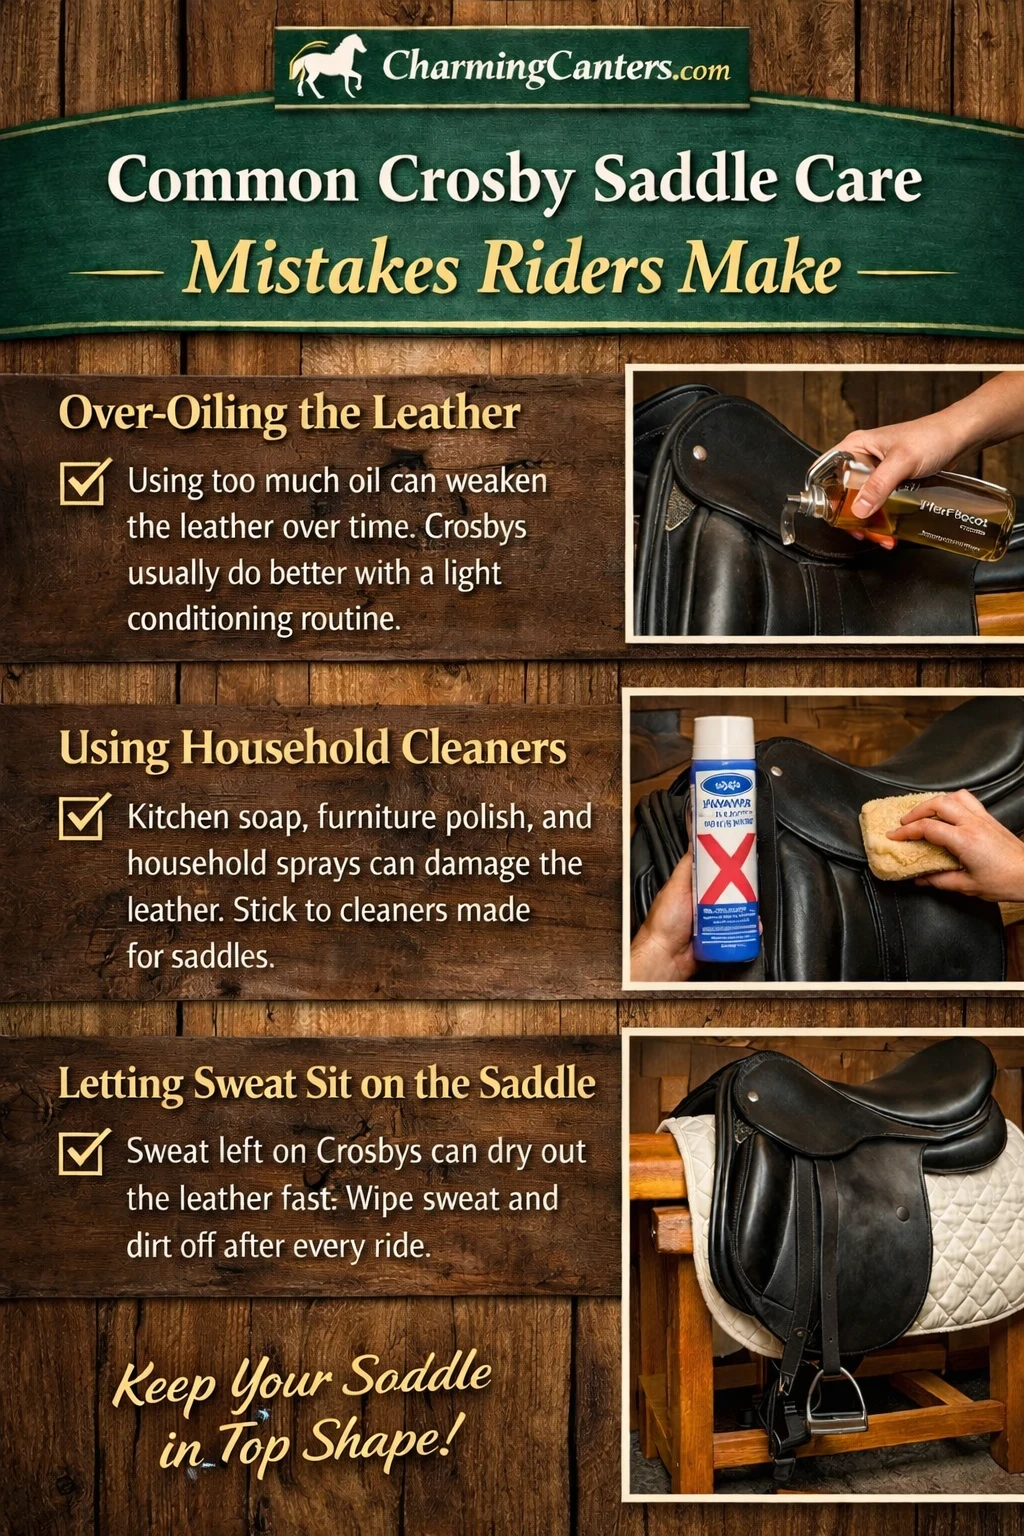
Over Oiling the Leather
One thing I see a lot is people slathering on oil, hoping to bring back softness. Too much oil can actually weaken the leather fibers. Using a balanced conditioning approach keeps the leather healthy without overdoing it. Stick with moderation; you’ll get the best results that way.
Using Household Cleaners
Using kitchen soap, furniture polish, or alcohol products might seem handy but can break down the finish and structure of the leather. I always stick to products made specifically for equestrian tack; it pays off in the long run.
Letting Sweat Sit on the Saddle
Barn days can get busy, but skipping the quick post ride wipe leads to sweat stains that are tough to remove and will dry out the leather fast. I keep a damp sponge within reach after every ride for this reason. Making this a habit is a small step with a big impact.
Signs Your Crosby Saddle Needs Deep Conditioning
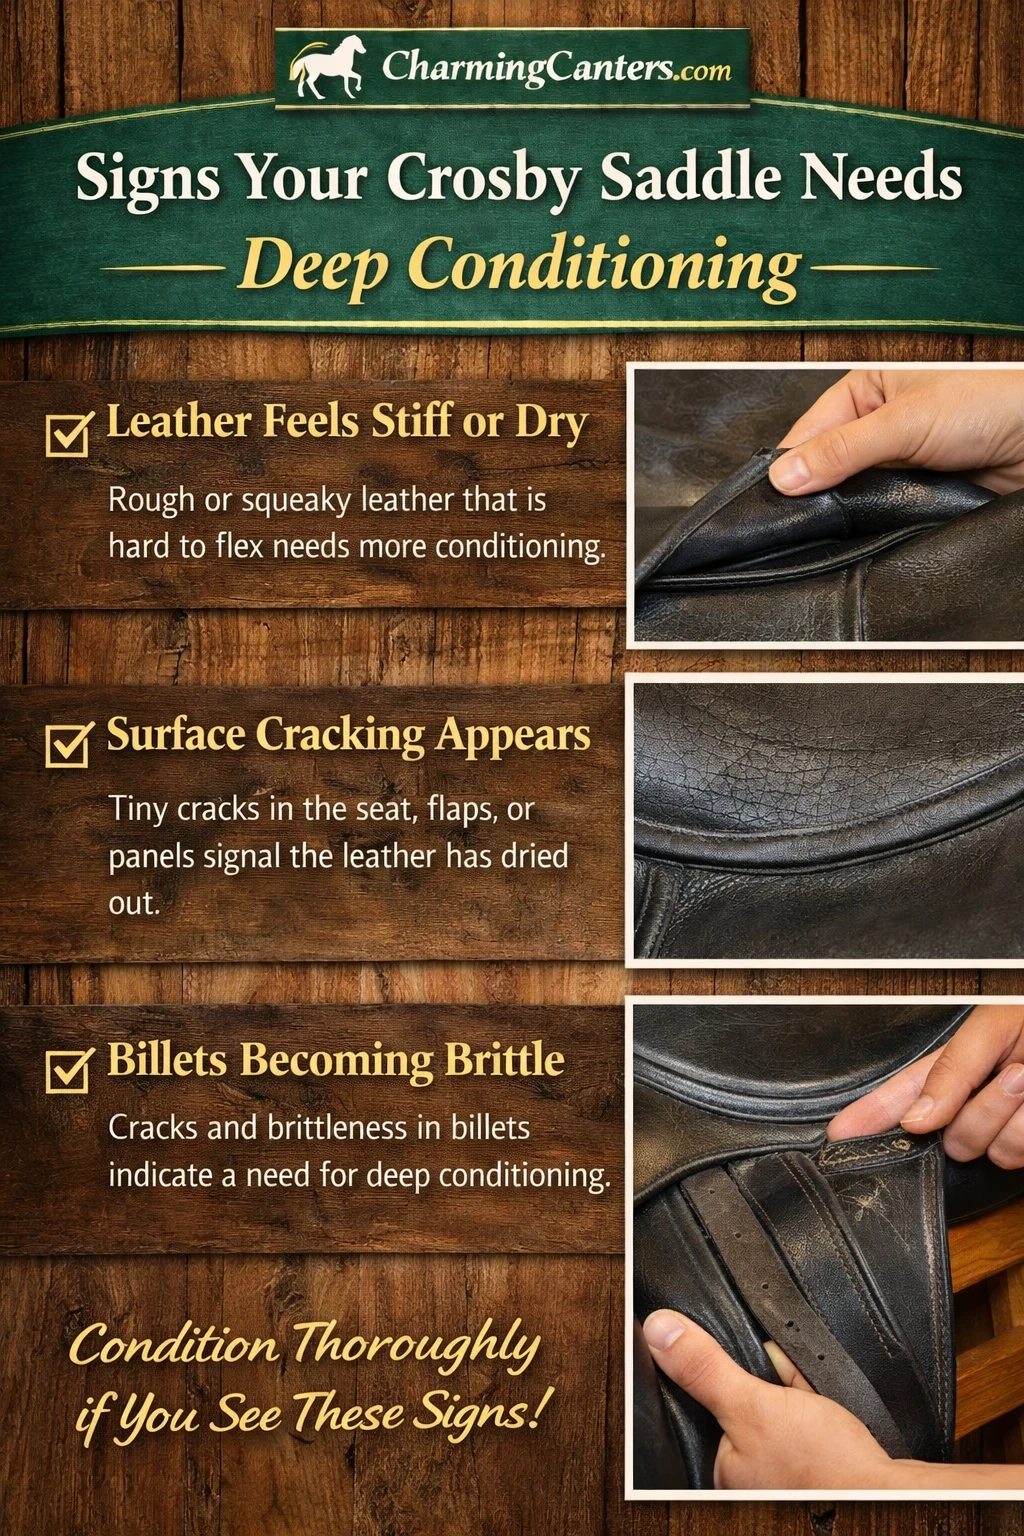
Leather Feels Stiff or Dry
If the saddle squeaks, feels rough, or is hard to flex, it’s calling for a deeper conditioning treatment. The leather may need more than its usual dose of conditioner, sometimes a few rounds with plenty of drying time in between. Staying sharp to these changes keeps your gear reliable.
Surface Cracking Appears
Tiny cracks along the seat, flaps, or panels mean the leather lost too much moisture. While deep cracks can’t always be fixed, early treatment helps prevent them from getting worse. Regularly checking for cracks makes it easier to keep your saddle looking and performing its best.
Billets Becoming Brittle
Brittleness, flaking, or visible lines on billets call for special attention. Condition them carefully and consult a saddler about safe replacements if you notice major changes. Don’t let a minor problem become a big one and always check these areas during routine cleaning.
How Long a Well Maintained Crosby Dressage Saddle Can Last
Typical Lifespan of Crosby Saddles
Plenty of Crosby saddles from the 1990s and even earlier are still in active use thanks to solid maintenance habits. With proper care, 20 years of life is pretty straightforward; longer is common, especially if you pay close attention to regular conditioning and safe storage.
How Maintenance Affects Saddle Longevity
Regular care not only makes your Crosby more enjoyable to ride in, but it also keeps the leather and stitching ready for decades of service. Saddles that skip cleaning, conditioning, or safe storage often end up with preventable damage that shortens their lifespan.
Plus, attentive maintenance makes it easier to spot minor wear before it turns into a bigger problem, which helps ensure your saddle is always ready for the next ride.
Final Thoughts on Caring for a Crosby Dressage Saddle
Taking a few extra steps for your Crosby saddle pays off with comfort, durability, and resale value for years to come. If you’re curious about what sets these saddles apart, check out my Crosby Dressage Saddle Review or if you’re thinking of shopping, here’s a guide on How to Choose the Right Crosby Dressage Saddle.
For even more info on fit and preservation, my Dressage Saddle Fitting Guide, Weatherproofing Techniques for Saddles, and When Should I Replace My Crosby Dressage Saddle bring you extra peace of mind.
With regular cleaning and a little savvy conditioning, your Crosby can be an excellent partner for decades of riding adventures. In the end, dedicated attention to care preserves the saddle’s good looks and performance, keeping both horse and rider happy for the long haul.