
A new jumping saddle can really switch things up for both you and your horse. There’s often some stiffness, squeaks, and discomfort during the first few rides, but getting through the break-in stage can be pretty smooth with the right steps.
Here, I’ll share my experience-backed approach to breaking in a new jumping saddle quickly, adding in tips and details you’ll actually use.
What Is a Jumping Saddle?
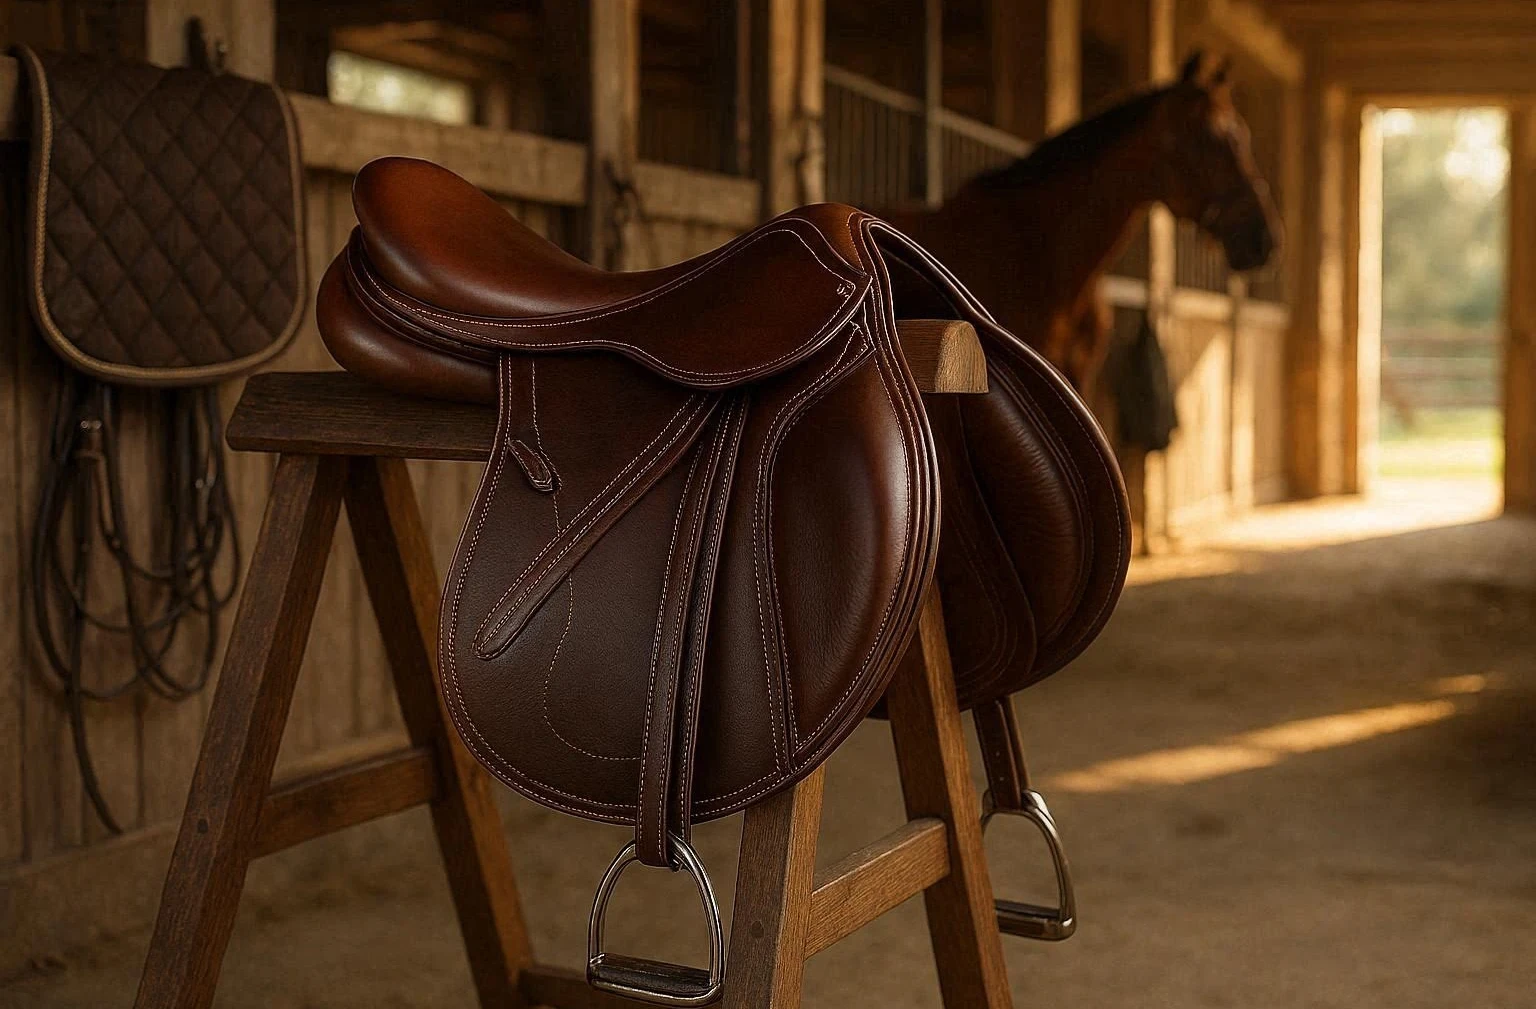
A jumping saddle is a type of English riding saddle designed for show jumping, eventing, and hunter-jumper activity. These saddles have a distinct forward cut flap and a flatter seat, letting you move freely and stay in balance over jumps.
The design helps you get into a two-point or half-seat position with ease, so you never feel stuck or restricted. You’ll also notice pronounced knee and thigh blocks for leg support when your horse goes over fences or lands after a big oxer.
If you’re new to English saddles, the jumping saddle clearly stands apart from dressage and all-purpose models because it’s built mainly for motion and flexibility.
Some riders eventually switch out their all-purpose saddles for a jumping specific model as their skills and show goals grow, finding the shape and structure much more comfortable once bigger fences come into play.
When Should I Specialize in a Jumping Saddle?

I waited until I was regularly schooling courses around three feet before investing in a dedicated jumping saddle, but you might want one sooner if you find your current seat or leg position awkward when jumping.
If you’re riding multiple disciplines, starting with an all-purpose saddle works, but once jumping lessons, competitions, or cross-country days become a regular part of your schedule, going for a jumping saddle makes everything much easier and safer.
Young riders and those taking casual lessons usually don’t need to specialize right away, but anyone aiming for precision, comfort, or advanced work can really benefit from the specific design, support, and close contact feel of a true jumping saddle.
When your goals get more focused, having the right tool for the job helps both you and your horse perform better.
Jumping Saddle Basics
Getting to know the structure and important pieces of a jumping saddle helps smooth the break-in process and makes maintenance a breeze. Here’s a rundown of what you’re looking at:
- Seat: Typically flatter and set a bit farther forward than a dressage model for maximum movement.
- Flaps: More angled and forward cut, so your knees stay protected and ready in jumping position.
- Knee and Thigh Blocks: Give extra grip and confidence, keeping your leg steady even during awkward take-offs or landings.
- Panels: The underside part that rests on the horse’s back. Needs to mold comfortably to your horse’s shape as the saddle breaks in.
- Leather: The quality, thickness, and feel of the leather really affect how a saddle needs to be broken in. Soft calfskin usually takes less effort than stiff, buffalo, or grain leathers.
I always recommend getting a feel for your saddle’s particular leather type and construction, since this has a big effect on how you condition, clean, and break in your saddle.
Types of Jumping Saddles
The world of jumping saddles is bigger than you may expect. Here are the main types you’ll see around barns and at shows:
- Close Contact Saddles: Designed to put you as close to your horse as possible, with minimal padding, making them a favorite among hunterjumper riders who want to track down every subtle movement.
- Eventing Saddles: Built for multiphase eventing, usually featuring a slightly deeper seat and extra blocks for crosscountry stability over solid obstacles.
- Monoflap Saddles: These have just a single layer of leather between you and your horse, with girth straps attached directly to the flap. This delivers even closer contact and has grown popular for advanced riders.
Within each main type, there are plenty of variations depending on your height, leg length, seat width, and personal likes. If you get help from a saddle fitter, they’ll walk you through what works best for you and your horse.
Jumping Saddle Features That Matter
Smart features make breaking in a new jumping saddle and using it every day a whole lot better. Here are details I check for when reviewing or shopping:
- Adjustable Gullet: Lets you change the width at the pommel to fit your horse’s shifting shape over time. This is especially useful for young or still-developing horses.
- Removable/Adjustable Blocks: Allows you to move or swap out leg blocks so your support lines up with your riding preferences and changing skills.
- Quality Billets: Well-stitched, strong billets keep the saddle secure and usually break in at the same pace as the main body.
- PreOiled or Soft Leather: Saddles with pre-treated or calfskin leather start out more flexible, which means breaking in can be much faster and easier.
- Lightweight Panels: Some brands use foam or carefully flocked panels that sculpt to your horse’s back more quickly, making the ride smoother even in the saddle’s first outings.
How To Break In a New Jumping Saddle Quickly
Breaking in a saddle well keeps both rider and horse comfortable. Here’s the process I use and recommend:
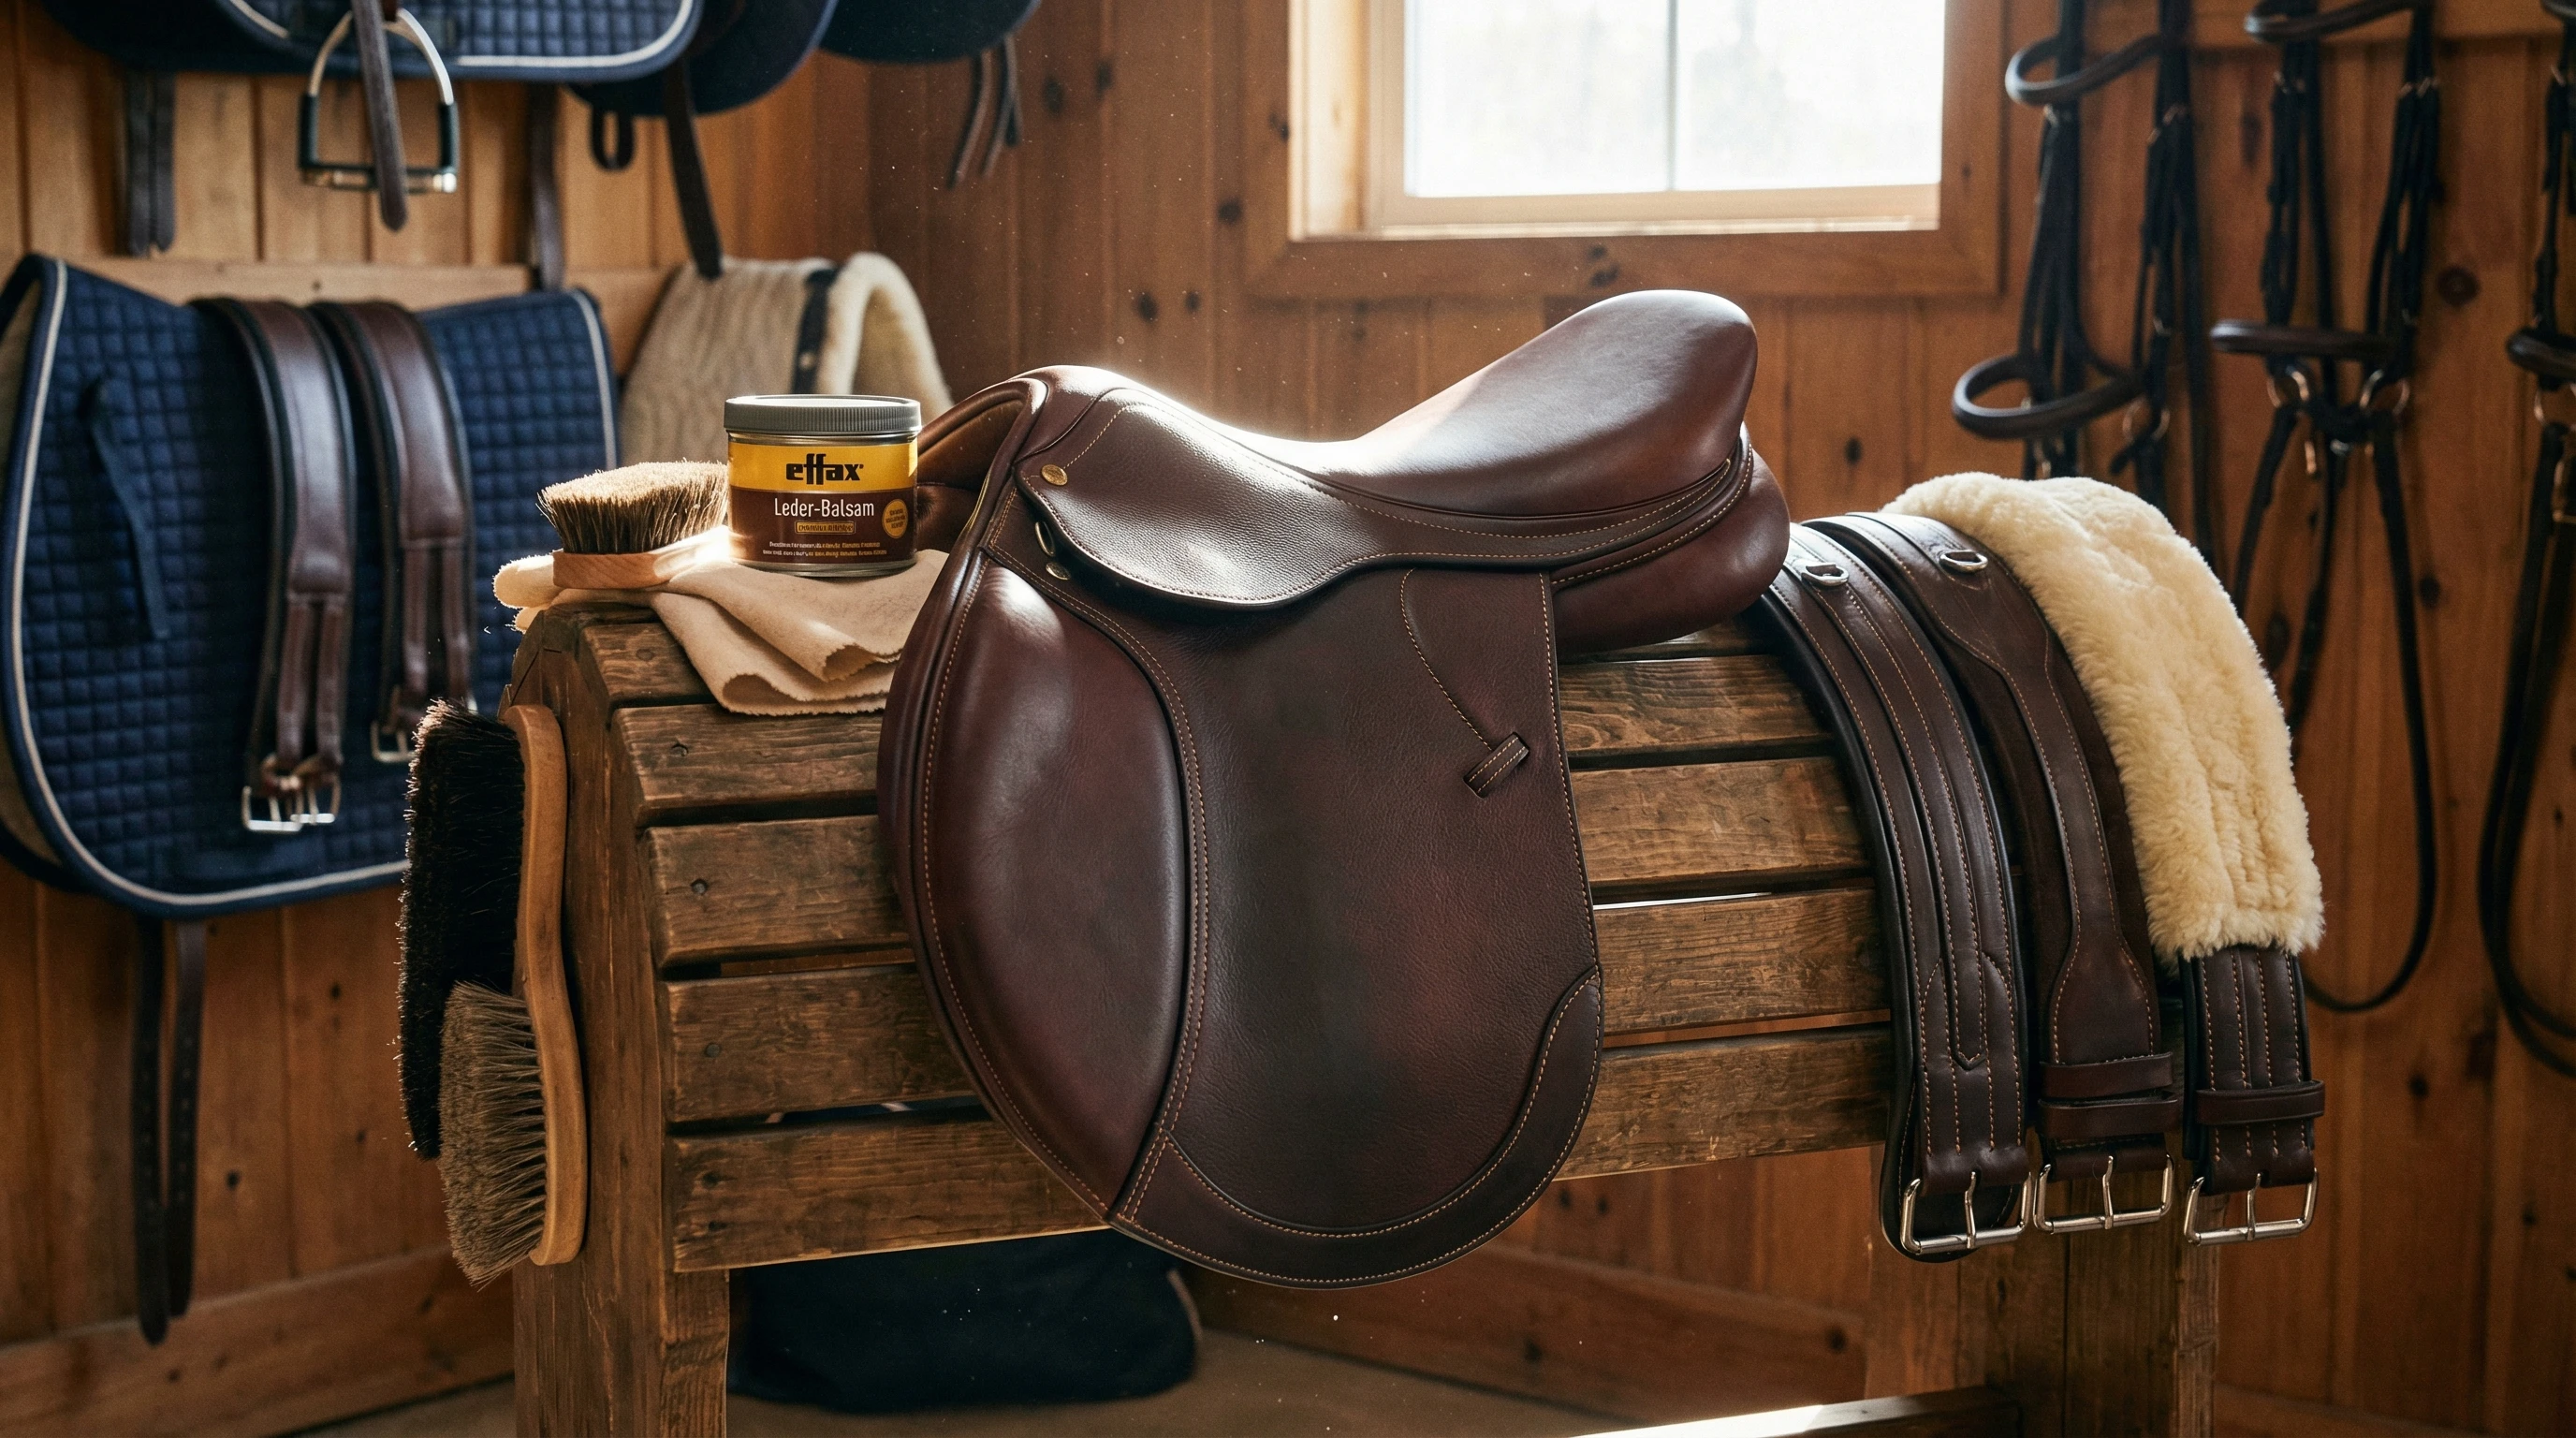
- Condition Before the First Ride: Use a light layer of leather conditioner (not heavy oil) as soon as you get your saddle. Let it soak in, then wipe off any extra so you don’t oversoften the leather.
- Flex with Your Hands: Work the flaps and seat gently with your hands to ease up stiff areas, but don’t force sharp bends. Let the leather gradually loosen up.
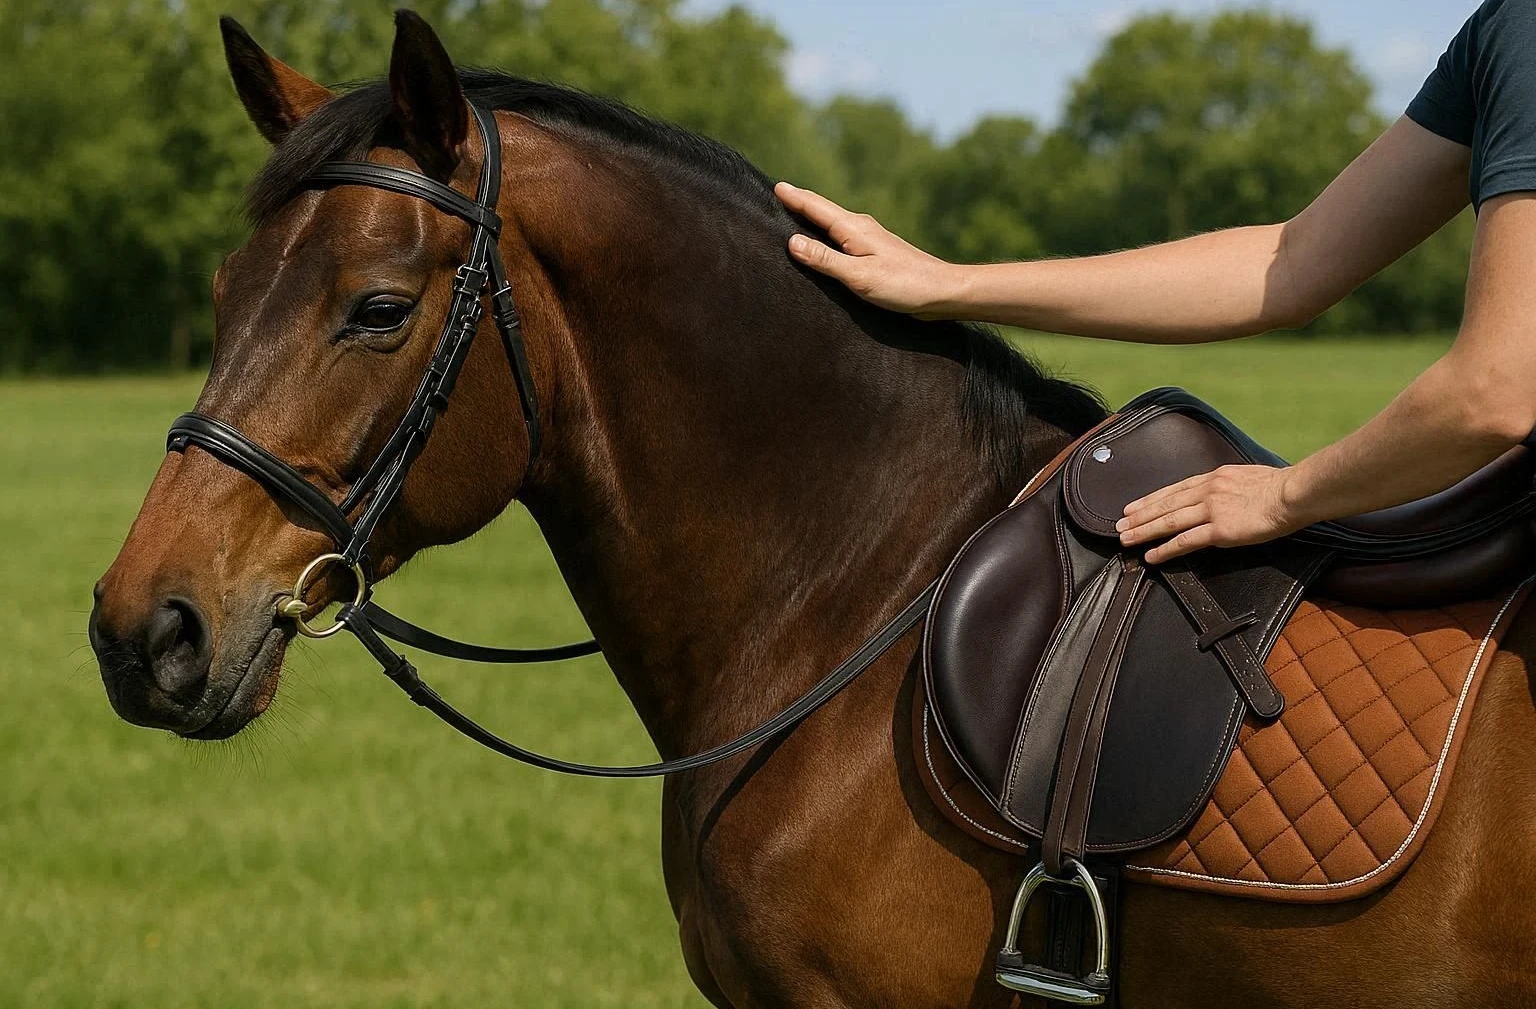
- Start With Short Rides: Begin with 10-20 minute rides using a well-padded saddle pad. This gradual intro gives both you and your horse a chance to adjust.
- Ride Without Stirrup Leathers for a Test: Some trainers like to have you sit in the saddle with your legs moving freely, which helps shape the seat and flaps to your build.
- Apply Conditioner Regularly (But Lightly): Continue using conditioner after each ride for the first week, always focusing on the underside and areas with the most friction.
- Clean Sweat After Every Ride: Wipe down the saddle with a damp cloth to remove sweat and prevent salt build-up, keeping the leather soft and in top shape.
How Long Does It Take?
Most well-made leather jumping saddles start feeling more comfortable after 5 rides, with a full break-in generally happening between rides 15 and 20. Super soft leather or preoiled saddles may break in even faster, but premium, stiffer leathers might take up to a month of steady use.
Things To Consider Before Breaking In Your Jumping Saddle
Think about these important points before you dig into the breakin process:
- Saddle Fit: Always double check the fit for both horse and rider before breaking in a saddle. If anything feels pinchy or off, check in with a pro saddle fitter. Breaking in a poor fit only makes problems worse.
- Leather Quality: Lower-priced saddles often use synthetic or thin leathers, making break-in tricky and leading to less comfort longterm. Buying a good grade of leather saves a ton of hassle.
- Climate: Extremely dry or wet conditions will affect how fast your saddle softens. If where you live is especially dry, try to store your saddle somewhere with moderate temperature and humidity so the leather stays supple.
- Horse’s Back Shape: If your horse has sensitive areas or high withers, use extra padding for the first few sessions and keep an eye out for any soreness.
Cost of Jumping Saddles
Jumping saddles range from budget-friendly to premium, with plenty of solid midrange options that offer both quality and value. Entry models begin around $700-$1,000, like the Wintec line or Bates synthetics. High-end leather models from brands like CWD, Antares, and Voltaire can reach over $5,000. I find most experienced riders settle around the $2,000-$3,500 mark for a solid new or lightly used saddle.
The exact price depends on leather type, the craftsmanship, chosen brand, plus any extras like fitting services, new girths, pads, and cleaning supplies.
Best Jumping Saddle Brands That Are Worth Checking Out
Brand reputation really does matter for jumping saddles. Here are several brands that always seem to win riders over:
- CWD: Famous for their comfortable, grippy calfskin and stylish, customizable saddles. These are favorites among top show jumpers.
- Antares: French-built, plush, and focused on close contact. Many eventers and show jumpers swear by them.
- Arena: You’ll feel like a star in the Arena Pony Monoflap Jump, a smart single-flap saddle that helps you stick close to your pony. With comfy knee blocks to keep you steady and less leather between you and your horse, you’ll be ready to tackle jumps with confidence.
- Bates: Known for adjustable trees, a strong selection of lightweight synthetics, and reasonable prices.
- Voltaire Design: Modern, light, and with models designed to suit a wide variety of horse and rider builds.
- County: Very durable and traditionally made, offering plenty of fit options for hard-to-fit horses.
Shopping for a used saddle is a smart way to get a top brand at a more affordable price. I’d always suggest working with a trusted tack shop or fitter to double-check a used saddle’s condition and ensure it’s safe and sound.
Frequently Asked Questions
Question: How can I make my new jumping saddle more comfortable right away?
Answer: Use a conditioning cream on the parts that touch your horse the most and gently flex the leather with your hands before riding. Adding a sheepskin or half pad can make the first few rides a lot more forgiving on both you and your horse.
Question: Will using oils help my saddle break in faster?
Answer: Light oil can work with very tough leathers, but it tends to oversoften or even harm other leather types. Stick to creams and conditioners for better day-to-day leather care.
Question: Can I break in my new saddle by just leaving it in the sun or using a heater?
Answer: Sunlight and heat can dry out leather and lead to cracking. Always break in your saddle at a normal room temperature, using gradual rides instead of heat or sunlight.
Wrapping Up
Breaking in your new jumping saddle is all about steady, regular rides, paired with some careful use of conditioner. This balanced approach leads to fun, smooth rides and a saddle that molds perfectly to you and your horse.
By choosing a saddle with great leather, the features you need, and a proper fit, you’ll fast-track the break-in and be set for years of comfortable, stylish jumping rounds.
When your tack fits well and turns heads, your confidence goes up and your horse’s comfort gets a boost. That’s why taking the time to break in your new jumping saddle the right way is so important from day one.
Was this post helpful? If so, I’d love to hear your comments below. By the way, if you decide you want to try Western saddle disciplines, feel free to visit my site, Horse Saddle Comparison, where I review Western saddles for beginner and advanced riders.
I’ve watched horse racing several times, and I am always amazed by the skill and balance that riders demonstrate with every stride.
Reading about the process of breaking in a new jumping saddle gave me a newfound appreciation for the preparation involved in training—not just for the horse, but for the rider as well. Your description of conditioning the leather, beginning with short rides, and allowing the saddle to mold to both the horse and rider, highlights the care required before the serious work begins. It emphasizes how vital the equipment is to a rider’s training and performance.
Do you think the break-in process also affects how quickly a rider can build confidence in their seat and technique?
Hi Alice. Thanks for stopping by and commenting. I love your question. Here’s my answer.
Absolutely — the break-in process of a jumping saddle can definitely influence how quickly a rider gains confidence in their seat and technique.
Here’s how:
1. Grip and stability improve as the saddle softens.
A brand-new jumping saddle, especially one with firmer leather, can feel a bit slick or stiff. Until the leather starts to mold to the rider’s leg and soften in the flap, the rider may feel less “plugged in,” which can delay that sense of security over fences.
2. The saddle begins to contour to the rider.
As the panels, seat, and knee rolls break in, the rider naturally finds their balance point more easily. When the saddle supports the rider’s natural alignment, confidence usually climbs faster.
3. Leg position often gets steadier with a broken-in flap.
Stiff flaps can make it harder to maintain a quiet lower leg, especially when learning to stay secure in two-point or over bigger fences. Once the leather flexes and becomes grippier, technique tends to improve more quickly.
4. A softer seat can make riders more willing to push themselves.
If a seat feels rock-hard or overly slick, riders may hesitate to work on more challenging exercises. As the seat “gives” a bit, it often boosts comfort and confidence.
5. But a poorly breaking-in saddle can do the opposite.
If the saddle is built with the wrong tree shape or panel configuration for the horse, no amount of break-in will fix underlying stability issues. In those cases, confidence actually stalls or declines.
Bottom line:
Yes — the break-in process plays a real role in how quickly a rider feels secure and effective in a jumping saddle. A well-fitted, high-quality saddle that breaks in smoothly tends to accelerate both confidence and skill development, while a stiff or ill-fitting one can slow progress.
As someone who recently bought a new jumping saddle that felt like riding a board, this guide is exactly what I needed. Your step-by-step process makes a daunting task feel manageable. I’ve been doing the “stuff and store” method you described, and I can already feel a difference. The tip about using body heat and short, frequent rides is gold. Thanks for saving my seat (and my horse’s back)!
Hi Cian. I’m so happy my advice helped you. It’s really important to make sure the horse is comfortable. Buying the right saddle, using it properly makes all the difference for you and your horse.